A dull or weather-worn deck can detract from the beauty of your outdoor space. With the right tools, techniques, and professional guidance, you can restore its charm and functionality. This comprehensive guide will show you how to stain a deck effectively, offering expert tips and actionable steps for a flawless, long-lasting finish.
Why Stain Your Deck?
Staining your deck does more than enhance its appearance—it protects your wood from weather damage, prevents cracking and peeling, and ensures its longevity. With regular staining, you can:
- Prevent Water Damage: Deck stains repel water, reducing the risk of wood rot and warping.
- Block UV Rays: Protect your wood from sun damage, which can cause fading and cracking.
- Maintain Aesthetic Appeal: Enhance the natural grain and beauty of your wood with a stain that complements your home.
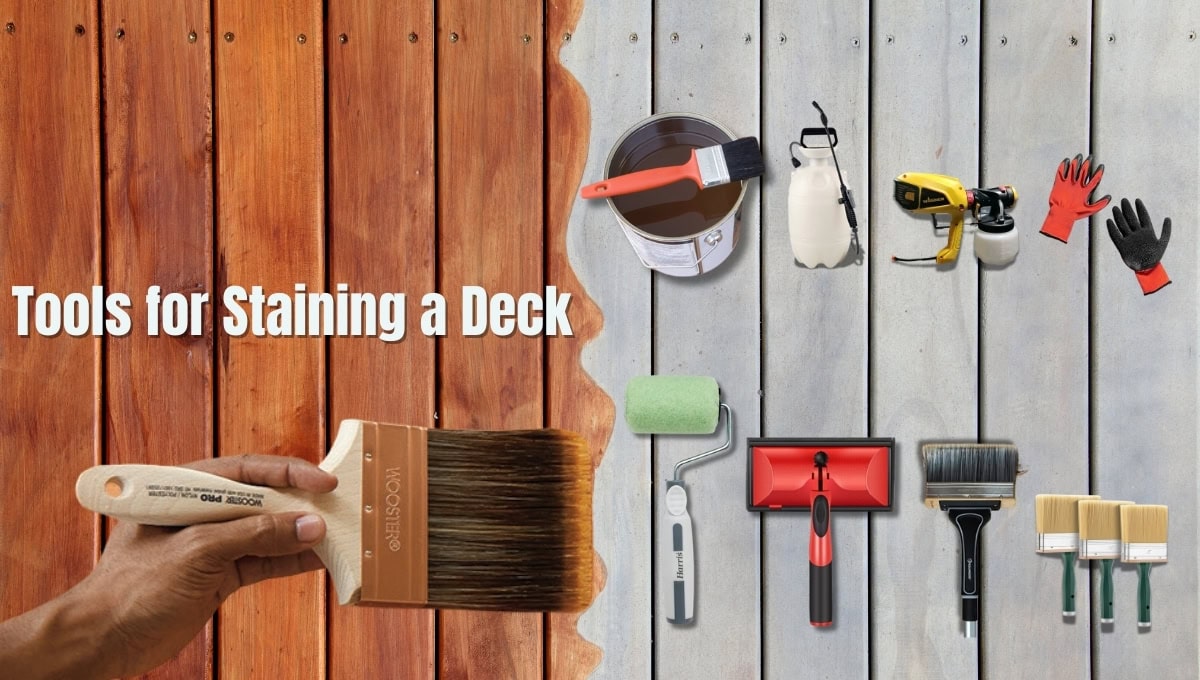
Before You Begin: Materials and Tools You’ll Need
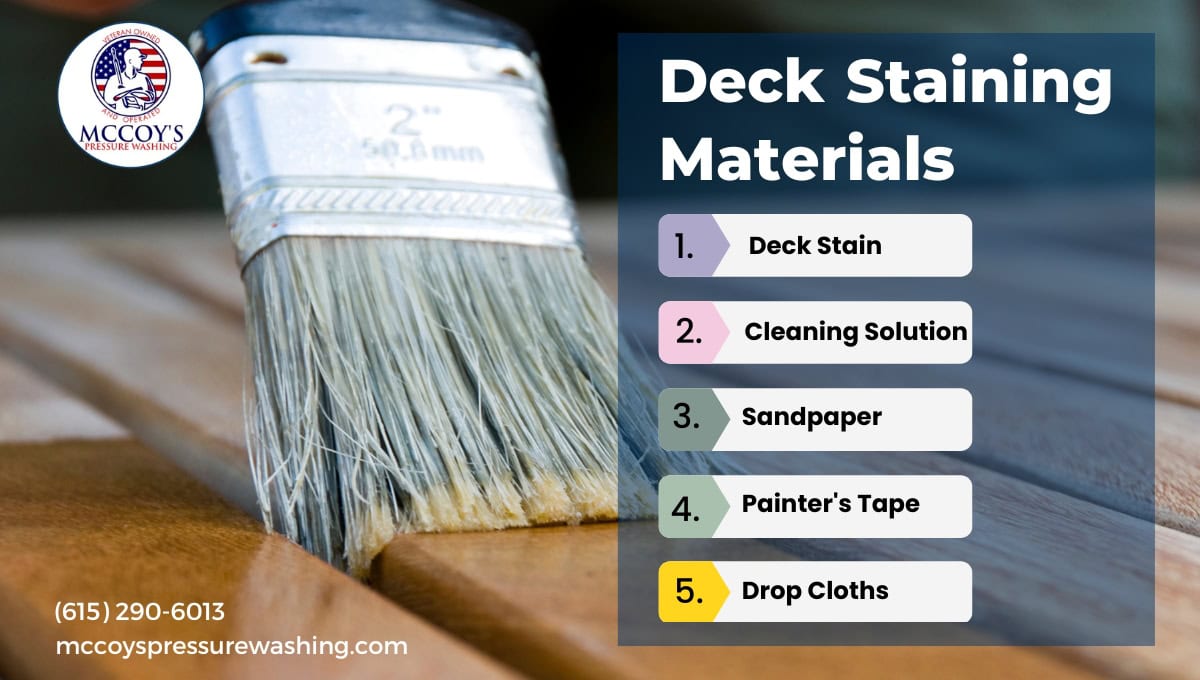
Having the right tools and materials on hand ensures a smooth staining process:
Essential Materials:
- Deck stain (choose UV-resistant or water-repellent options).
- Deck cleaner and brightener.
- Sandpaper for smoothing surfaces.
- Painter’s tape to protect adjacent areas.
- Drop cloths to prevent staining surrounding areas.
Must-Have Tools:
- Deck Brush Applicator: For deep stain penetration and even coverage.
- Paint Brushes: Ideal for tight corners and edges.
- Rollers or Sprayers: Best for large surfaces to save time.
- Paint Tray: Keeps stain accessible during application.
- Protective Gear: Gloves, goggles, and a mask to stay safe from fumes and splashes.
Step 1. Inspect the Deck
Before staining, carefully inspect your deck to ensure it’s in good condition:
- Check for Damage: Look for loose nails, cracked boards, or rot and repair them as needed.
- Test for Mold and Mildew: Use a mold remover if necessary, as these can prevent proper stain adhesion.
- Assess Previous Coatings: If your deck has old, peeling stain, remove it completely for the best results.
Step 2. Clean the Deck
A clean deck is critical for proper stain adhesion and a professional finish.
Cleaning Tips:
- Sweep Away Debris: Remove all dirt, leaves, and loose particles.
- Use a Deck Cleaner: Apply a wood-specific cleaner to break down oils, grime, and old coatings.
- Pressure Wash (Optional): A pressure washer at 1,500 PSI can remove stubborn dirt, but be gentle to avoid damaging the wood.
- Apply a Deck Brightener: After cleaning, use a brightener to restore the wood’s natural color and remove any grayness caused by weathering.
Pro Tip: Allow the deck to dry for 24–48 hours before moving to the next step.
For a deeper dive into this process, explore our comprehensive guide on how to clean a deck to ensure a spotless and stain-ready surface!
Step 3: Sand for a Smooth Finish
Sanding helps remove rough spots, peeling stain, and raised fibers caused by cleaning.
- Use 80-grit sandpaper with an orbital sander for large areas.
- Focus on edges, railings, and high-traffic zones that show wear.
- Wipe down the surface after sanding to remove any leftover dust.
Step 4: Choose the Right Stain
Selecting the perfect stain ensures durability and enhances your deck’s beauty.
Types of Deck Stains:
- Transparent Stains: Highlight the natural grain and color of your wood.
- Semi-Transparent Stains: Provide a subtle color while allowing the grain to show through.
- Solid Stains: Offer maximum coverage and protection, hiding imperfections.
- Oil-Based vs. Water-Based: Oil-based stains penetrate deeply, while water-based stains dry faster and resist mold.
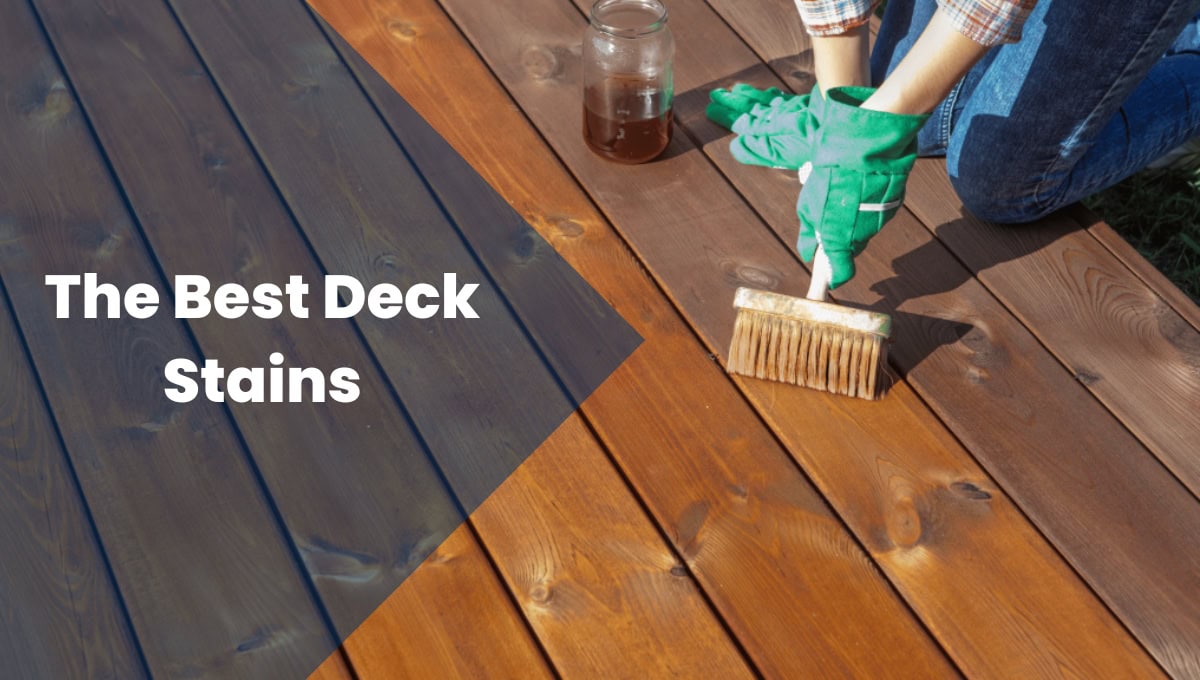
Step 5: Apply the Stain Like a Pro
With your deck fully prepped, it’s time to stain. Following these steps will ensure a flawless, professional-looking finish:
Cut in Edges First
- Use a small brush to carefully apply stain around railings, posts, and tight corners where precision is key.
Work in Sections
- Stain 2–3 boards at a time, always working along the grain to prevent lap marks and achieve a seamless finish.
Use the Brush On, Brush Off Technique
- Apply the stain generously with a brush or roller, then immediately back-brush to remove excess and ensure deep penetration into the wood.
Pro Tip: Avoid staining on hot, sunny days, as the stain may dry too quickly, leading to uneven patches or a less durable coating.
Investing in the right techniques and quality products can help you save on potential maintenance down the line, making the initial deck staining cost a worthwhile investment for a durable and beautiful outdoor space.
Step 6: Allow the Stain to Cure
Patience is key to achieving a durable, flawless finish:
- Wait at least 24 hours before walking on your deck.
- Avoid placing furniture or heavy items for 72 hours to prevent scratches.
Pro Tip: Drying times vary by stain type and weather, so always follow the manufacturer’s recommendations.
Additional Tips for a Long-Lasting Finish
- Apply Multiple Coats: For enhanced durability, apply 2–3 thin coats of stain, allowing each coat to dry completely.
- Reapply Annually: To keep your deck looking its best, clean and re-stain high-traffic areas every 12–18 months.
- Avoid Rain: Schedule staining on dry, overcast days with no rain forecast for at least 48 hours.
Common Mistakes to Avoid
- Skipping Prep Work: Inadequate cleaning or sanding can lead to peeling and uneven results.
- Applying Too Much Stain: Thick layers prevent proper absorption and cause peeling.
- Staining Wet Wood: Moisture trapped under the stain can lead to bubbles and peeling.
DIY staining can be rewarding, but for guaranteed results, professional services are invaluable. At McCoy’s, we offer:
- Expert Preparation: From cleaning to sanding, we ensure a flawless foundation.
- High-Quality Stains: We use premium products tailored to your deck’s wood type and climate.
- Proven Techniques: Our skilled team uses advanced methods for even coverage and long-lasting durability.
Don’t let a dull deck detract from your outdoor experience. Contact us today for professional deck staining services in Brentwood and surroundings that deliver exceptional results. Let us help you transform your deck into a stunning, durable centerpiece for your home!
FAQs on Deck Staining
What are the benefits of deck staining?
Staining your deck offers several benefits:
- Stain helps protect the wood from moisture, UV damage, and the wear and tear of daily use.
- Staining can enhance the wood’s natural grain, offering a range of colors and finishes that improve your home’s overall curb appeal.
- A well-maintained and stained deck can last many years longer than untreated wood.
- Regular staining can prevent the need for more expensive repairs or replacements in the future.
What are the things to check before deck staining?
Before you begin staining, ensure your deck is in the right condition for the best results. Here are key aspects to check before you start:
- Make sure your deck is clean
- Pick the right stain for your deck
- Remove previous coatings
- Wait for the right time to stain your deck
Do I need to sand the deck before staining?
Sanding the deck before staining depends on the condition of your wood. You should sand it if it’s a 10-year-old deck that has been weathered and worn.
If your deck is in pretty good condition but a bit rough in spots, then lightly rub it over with 80-grit sandpaper.
Sanding a deck smooths the wood surface, allowing the new stain to adhere better and last longer. That’s why you should use medium-grit sandpaper and always sand in the direction of the wood grain.
What not to do when staining?
When deck staining, avoid these common mistakes to achieve a professional finish:
- Do not rush the prep work.
- Avoid staining in direct sunlight.
- Remember weather conditions.
- Do not over-apply the stain.